Visual Studio Code Guidelines
Authors: Daniel Feller, Phil Wiffen
Overview
Using GitHub Desktop and Visual Studio Code helps simplify the creation of Tech Zone content. A set of rules is added to Visual Studio Code to validate proper markdown settings. In order to use this, the local environment must be set up and configured. This guide provides the steps needed to configure.
Visual Studio Code Setup
- Download and install Visual Studio code: Visual Studio Download
-
Once installed, launch Visual Studio Code to install the correct extension. This extension, when configured properly, will look for errors in the markdown language.
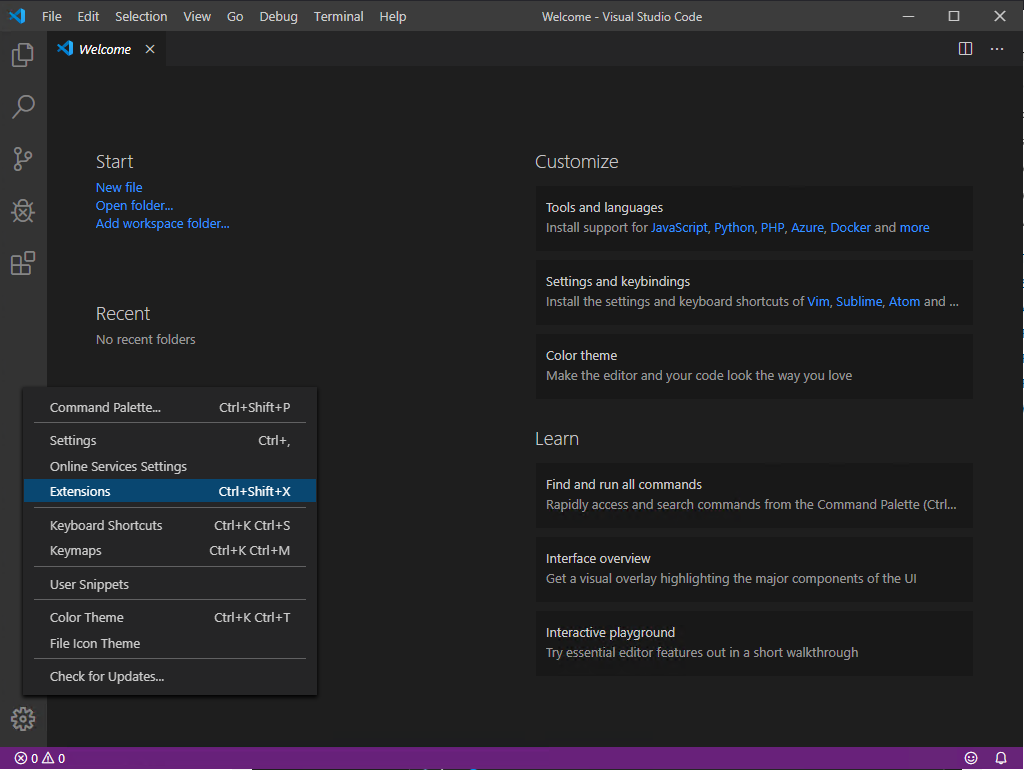
- Search for the extension “markdownlint”. Install
- In the local file system, navigate to
%AppData%\Code\User(Windows) or~/Library/Application Support/Code/User(Mac OS). - If it doesn’t exist: Create a file called “settings.json” and paste the following into it:
{
    "git.enableSmartCommit": true,

    "git.confirmSync": false,

    "git.autofetch": true,

    "markdownlint.config": {

        "MD003": { "style": "atx" },

        "MD007": { "indent": 4 },

        "MD009": { "br_spaces": 2 },

        "MD013": false,

        "MD024":false,

        "MD026": { "punctuation": ".,;:!" },

        "MD030": { "ul_single": 2,

        "ol_single": 2,

        "ul_multi": 2,

        "ol_multi": 2 },

        "MD033": true,

        "MD040": false
    }
}
- If settings.json does exist, then paste the following in, below any existing configuration lines:
    "markdownlint.config": {

        "MD003": { "style": "atx" },

        "MD007": { "indent": 4 },

        "MD009": { "br_spaces": 2 },

        "MD013": false,

        "MD024":false,

        "MD026": { "punctuation": ".,;:!" },

        "MD030": { "ul_single": 2,

        "ol_single": 2,

        "ul_multi": 2,

        "ol_multi": 2 },

        "MD033": true,

        "MD040": false
    }
-
Before saving, paste the entire text contents of the file into https://jsonchecker.com/ and fix any errors
-
Save and close “settings.json”
Note: You can also download extension Markdown All in One. This extension adds various features to VSC, including ability to use common keyboard shortcuts (Ctrl + B), table of contents, auto preview or simplified link creation.
Configure Workspace Trust in Visual Studio Code
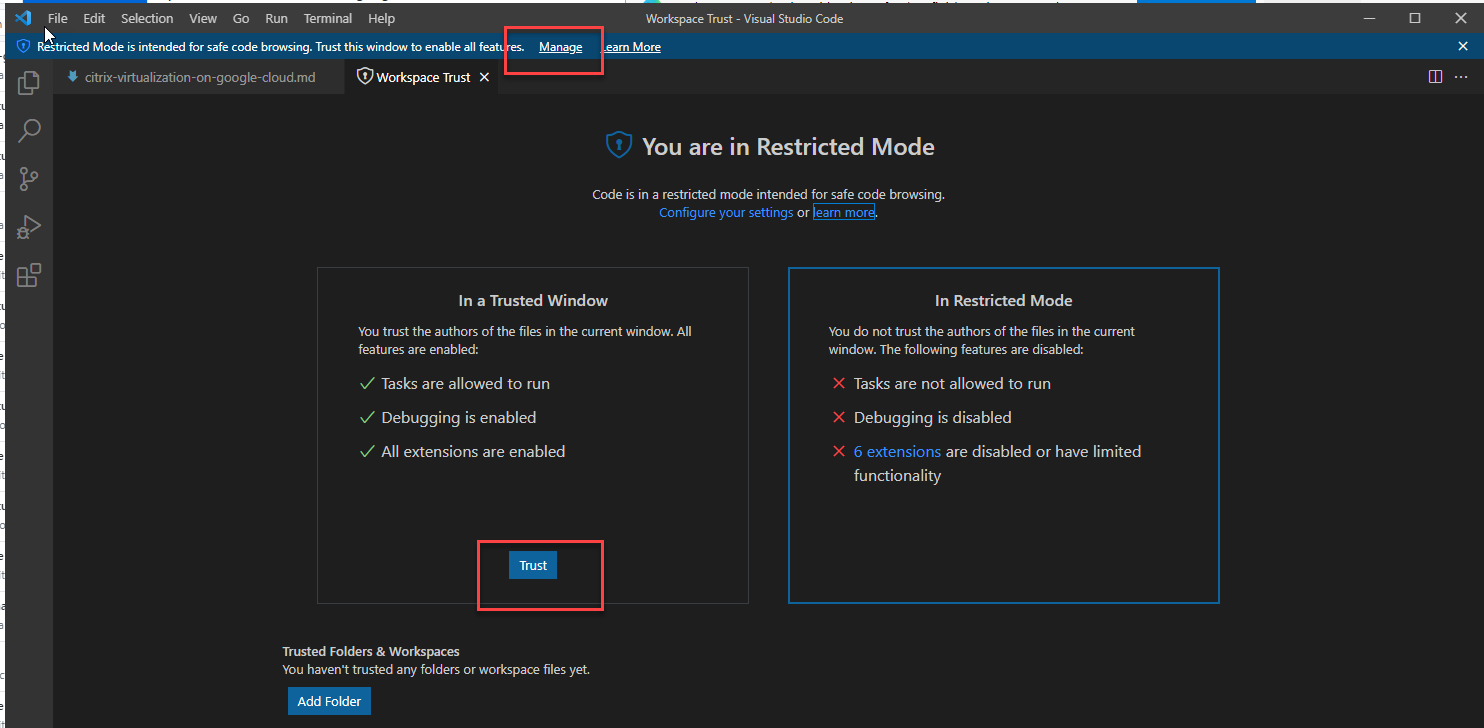
A relatively new feature in Visual Studio Code blocks markdown validation checks from working - so even if you do have errors in your markdown, you won’t be told. Read more about Trust here
You must ensure that you Trust the workspace you’re working from.
Here’s an example where I’ve clicked Manage and can then Trust the Workspace:
GitHub Desktop Setup
- Download GitHub Desktop GitHub Desktop Download
- When prompted, sign in to GitHub
-
Select the Tech Zone repository (called
citrixtechzone/en-us-tech-zone) and select clone. This process will take some time as a full clone of the Tech Zone is being stored on your endpoint.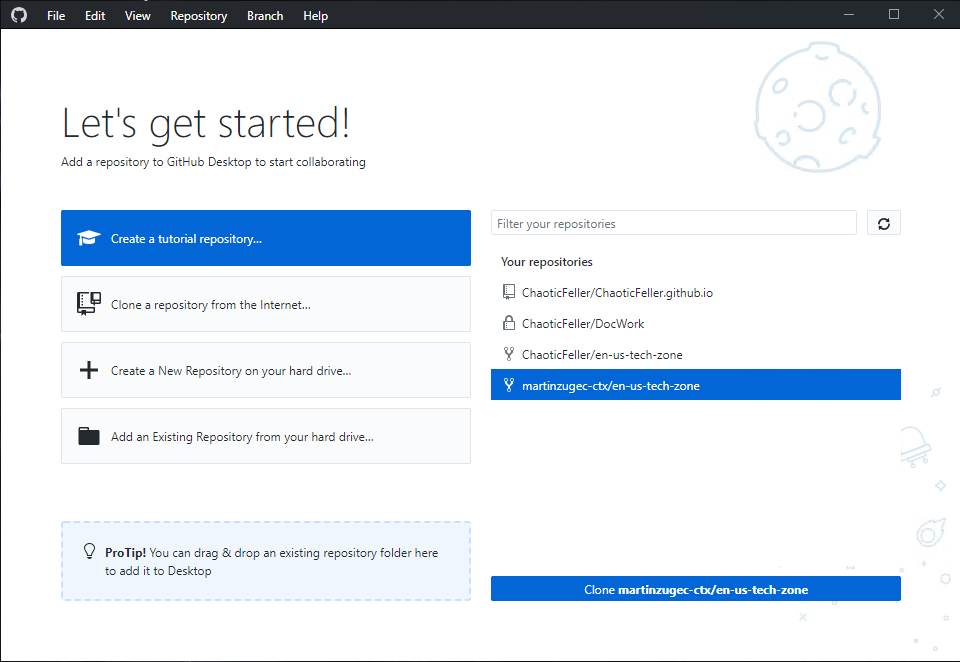
- If GitHub desktop asks how you are planning to use the fork, choose “For my own purposes”. This ensures you contribute to the correct repository under
citrixtechzone/en-us-tech-zone -
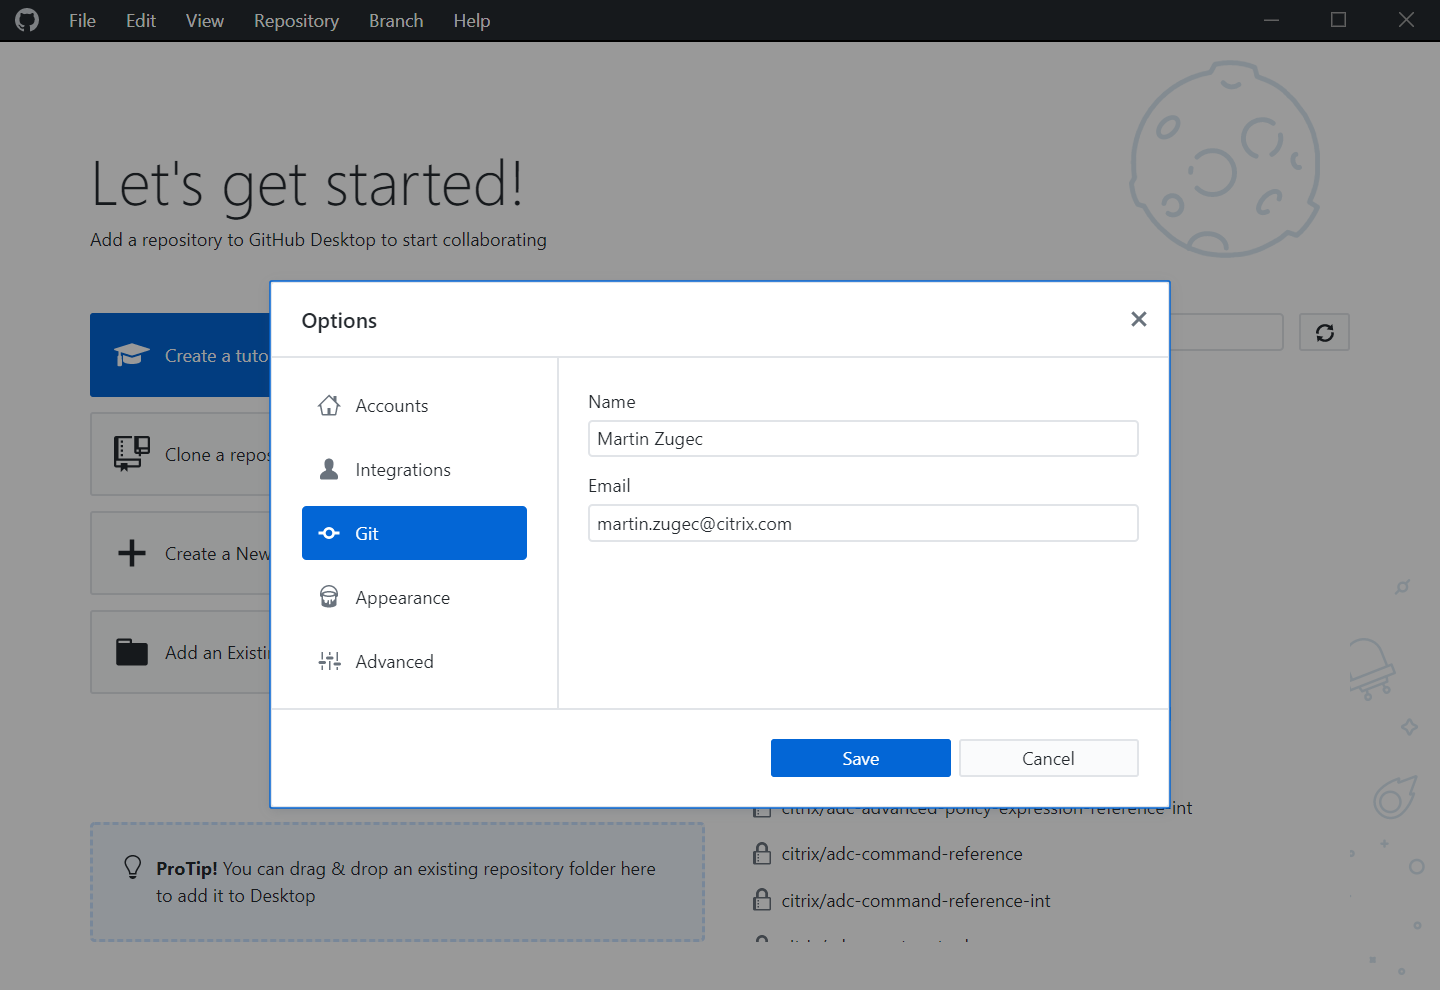
Make sure that your Citrix email address and name is configured in File -> Options -> Git. This is a required step to prevent alerts when publishing your content.
GitHub Desktop Usage
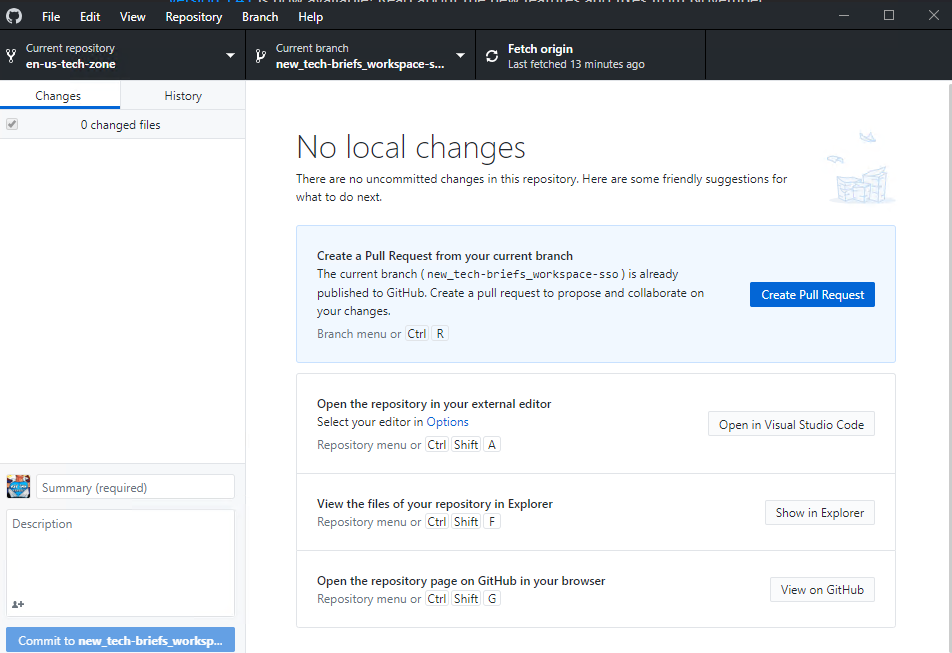
Once the clone is complete, you get to the main GitHub Desktop screen.
- Select the correct repository (
citrixtechzone/en-us-tech-zone) - Select the correct branch for your changes.
-
Select “Open in Visual Studio Code”
-
In Visual Studio Code, navigate to the correct article in the left-side navigation tree.

- As you edit, you can see an in-app preview of the page by typing the following key combination: In Windows use
Ctrl+K, then typeV. In Mac OS, useCommand+V. -
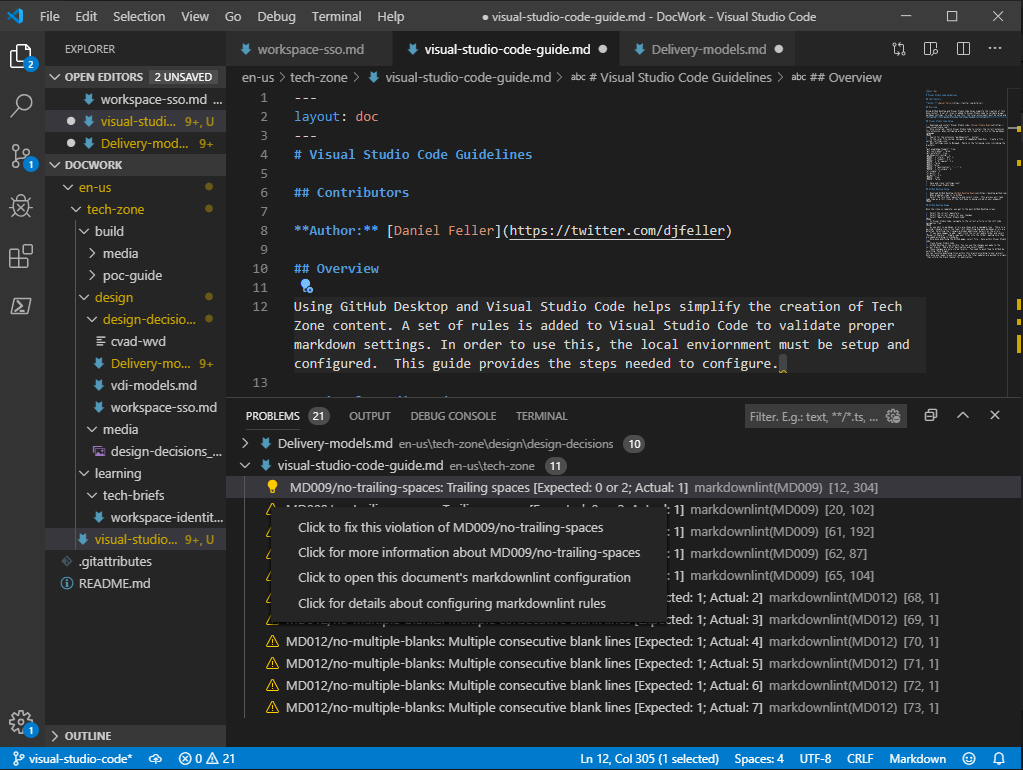
As you edit in markdown, errors are shown with a squiggly line. There is a warning triangle icon in the lower left identifying how many markdown errors are detected. Selecting the triangle provides additional details on the errors.
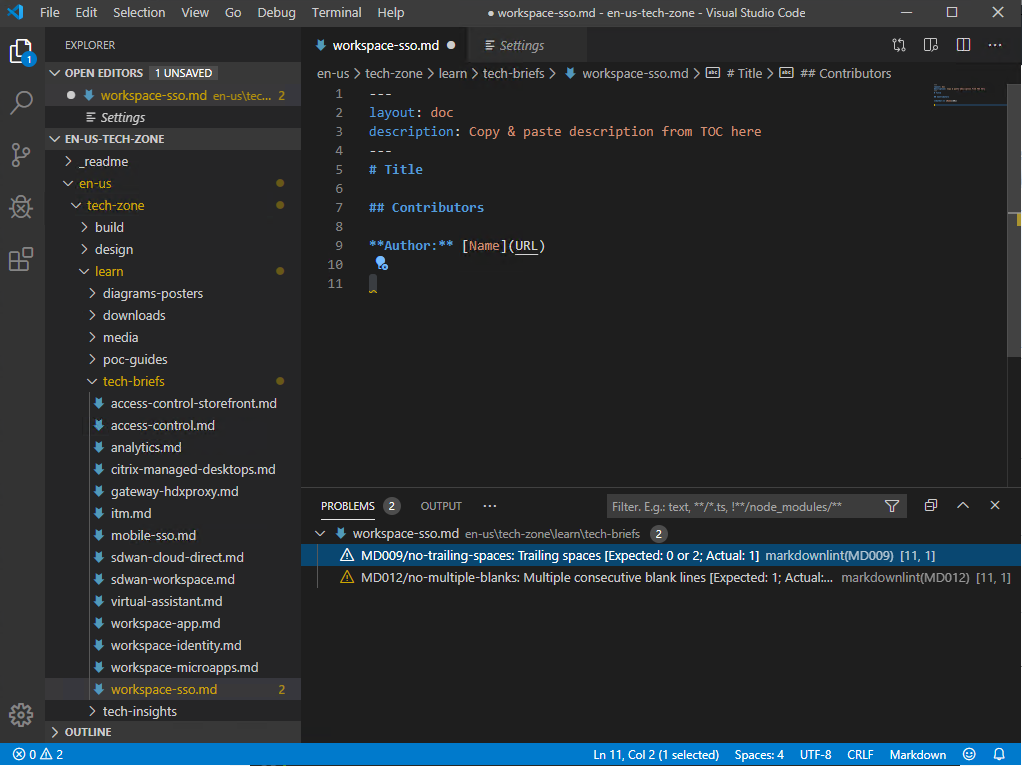
-
If you select the triangle in the Problems section, Visual Studio Code will fix many of the errors for you.
-
If you have images to add, right-click the correct media folder and select “Reveal in Explorer”. Simply copy your files into the folder, making sure they are named according to standards.

- Once done modifying the GitHub page, select File - Save within Visual Studio Code.
- Close Visual Studio Code
-
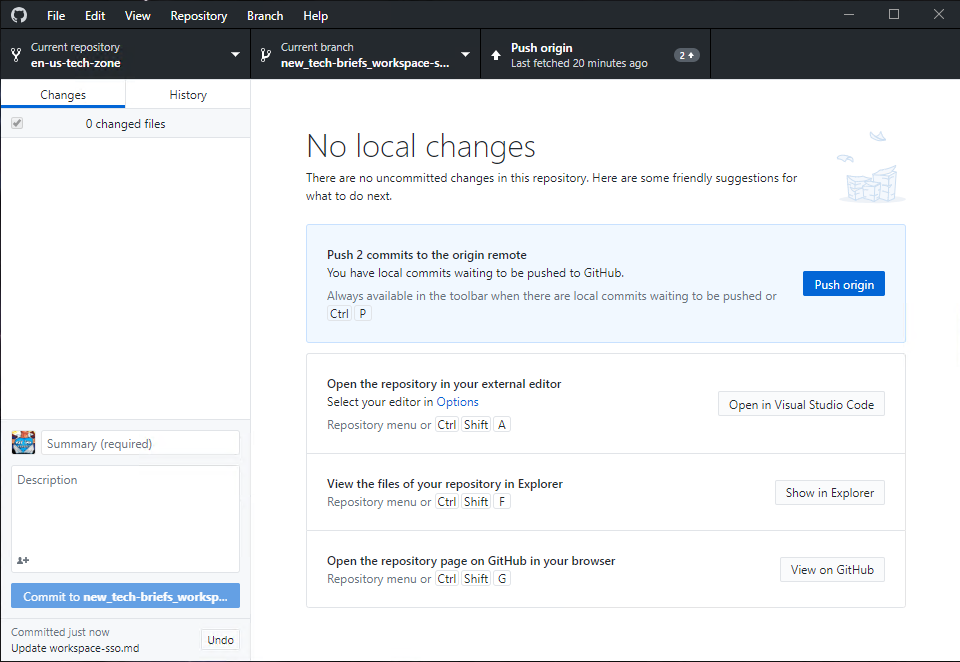
GitHub Desktop is now visible. You can see the changes you made to the current branch. Add a brief description and select Commit.
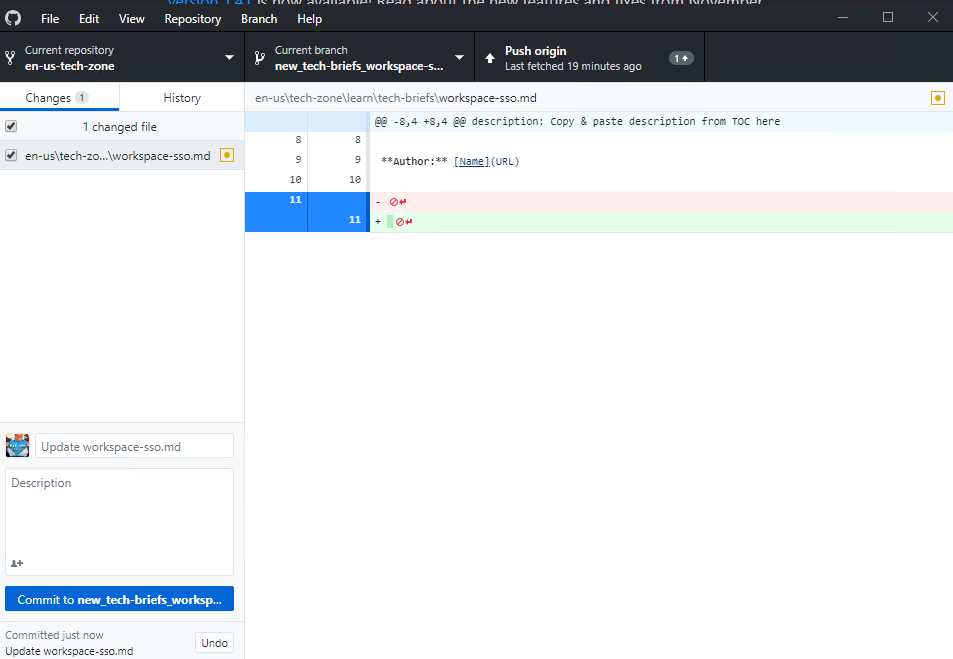
-
These changes are only stored locally. You need to push them to GitHub by selecting “Push Origin”.
You can continue modifying files within this branch according to your project. Once done and ready to publish, make sure the final updates are pushed to origin, then inform the Slack channel for publication.
Once the upload to GitHub is complete, verify the page renders properly by going to page within the browser.
Summary
Below is summary overview of steps required to publish content on GitHub and quick reminder of terminology.
- Save - Save changes to your local working folder
- Commit - Save changes from your working folder to your local database
-
Push - Upload changes from your local database to central database (GitHub)
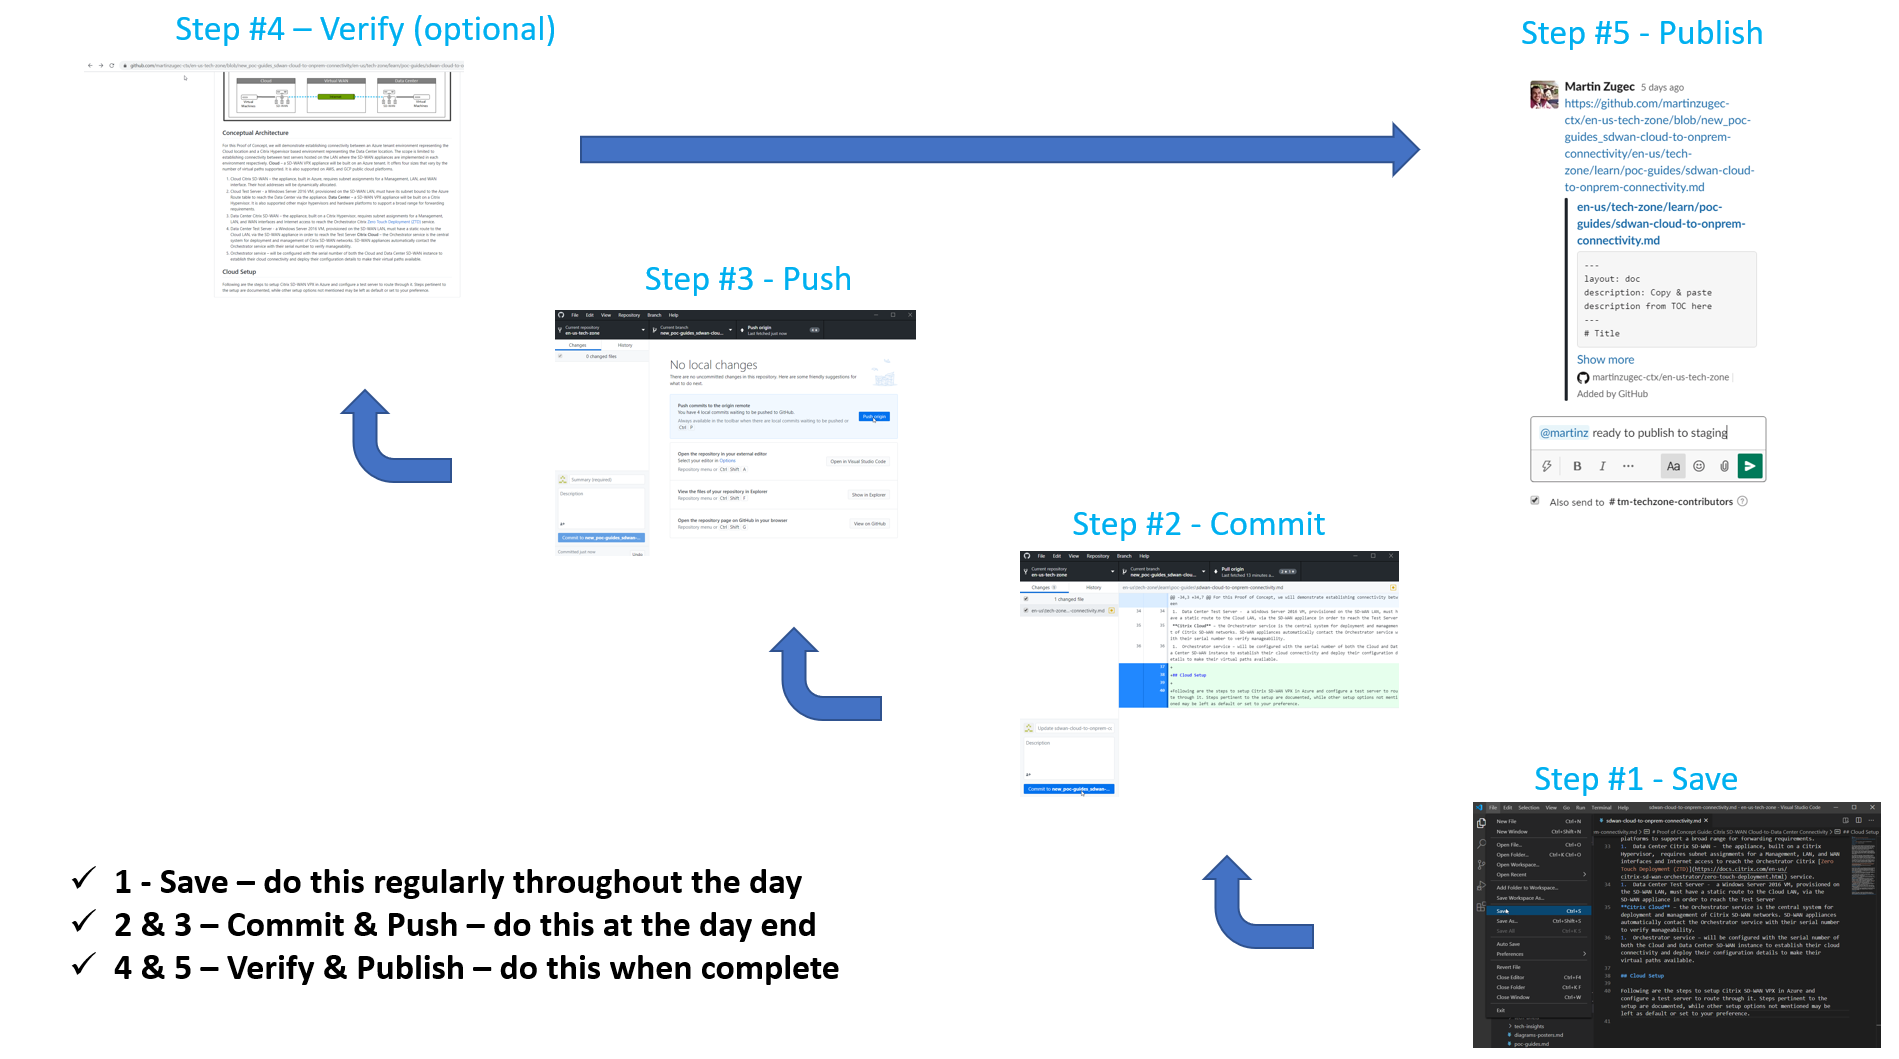
Don’t forget - until you Push your changes, central GitHub is not updated and your changes are not visible to others.